How to photograph floating pancakes?
How to photograph floating pancakes in the studio
Food photography is a pretty tricky subject. Not only does it require attention to details it also requires a knack to hack things and a DIY bent of mind. In this blog post, we cover our experience with photographing floating pancakes in the studio.
Here is a ‘how-to’ blog for you!
The lovely food that we see on photographs are almost always inedible. I am sorry to break this to you but there is substantial fixing done to the food material to make it look that pretty and appetizing. Our intern Tejo (who is in grade 9) decided to recreate images of food that he had seen somewhere. After some discussion we decided to let him attempt this shoot on his own with little help form the seniors in the studio.
The conditions were simple. Tejo had to put the shoot together and would only get help in setting up the lights or the backgrounds to ensure that everything was set up safely and he could shoot without any hindrances.

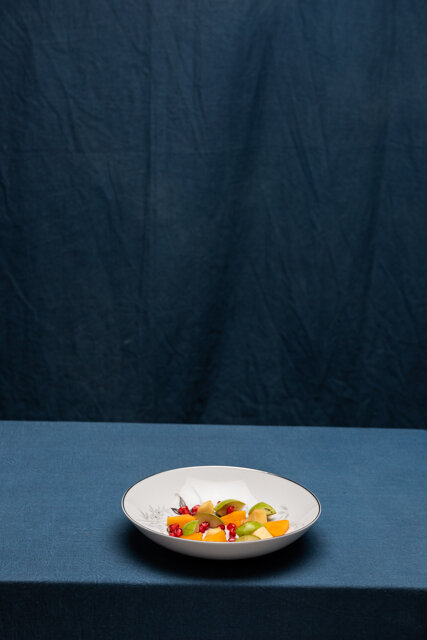
The final image of floating pancakes with fresh fruits and honey.
THE GEAR
The following gear was used in the shoot
Studio lights - Elinchrom FRX 400
Table
Hand painted fabric backdrop
Deep-dish plate
Chopped fruits
Toothpicks
Pancakes
Honey
Fork
Thick gauge wire
Old plastic lid
Tape
A glass
Reflector
THE SETUP
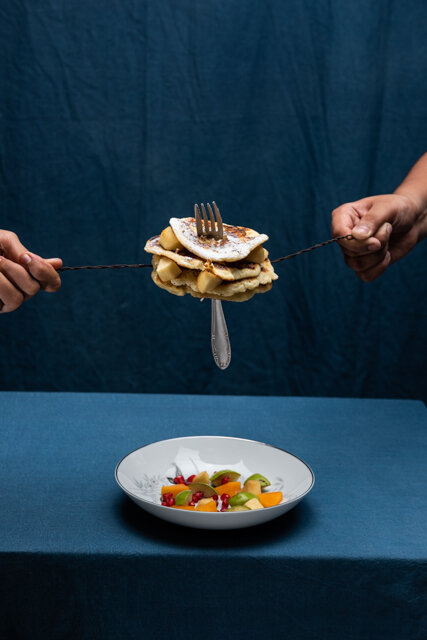
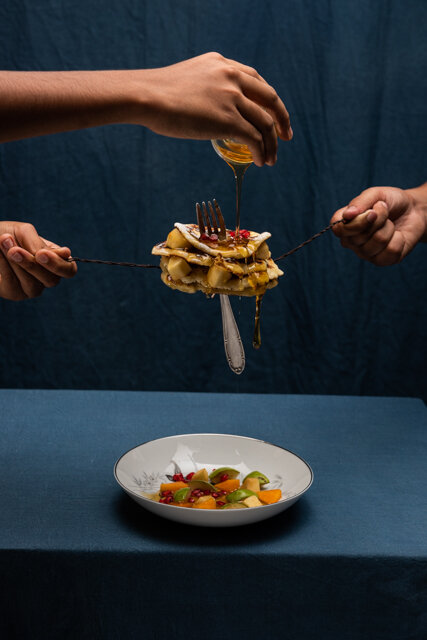
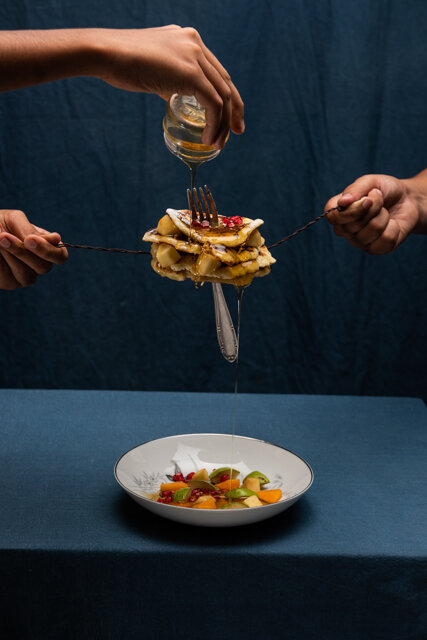
A blue backdrop was draped over the table, over which the deep-dish plate was placed. A slit was made in the plastic lid through which the fork was inserted. The lid was then taped to the neck of the fork to prevent the pancakes from sliding down through the neck of the fork.
The bowl was on kept on the bottom third of the frame. With this in mind the camera was setup on the tripod and it’s height adjusted accordingly. The fork’s handle was wrapped around with wire, with 25-35 cm of wire jutting out of the left and right side of the fork. The pancakes were then put through the fork and the fork was then placed in the glass. The glass was used to position the pancakes on the deep dish so that the camera could be focused on it.
Fruit pieces were then stuck between each pancake and held in place by pushing thru toothpicks. This kept them in place throughout the shoot. Remember to nip off toothpicks if they stick out over the fruits.
The primary Iight source was a Elincrom FRX 400 in with a 100cm Octabox placed directly above the table and a reflector was placed below the camera lens at a 45 degree angle pointing towards the bowl. This helped fill in the shadow under the bowl.
CAMERA SETTINGS
Camera settings for the shot: ISO 80, aperture: f9 and shutter: 1/125
THE PROCESS
After planning the picture for a day and after multiple test shots, this is the most efficient way to shoot the floating pancakes with little wastage of food.
With the help of two people we had the fork with pancakes held in place by the wire on both sides and move it over to the bowl. Care was taken to keep the fork as straight as possible.
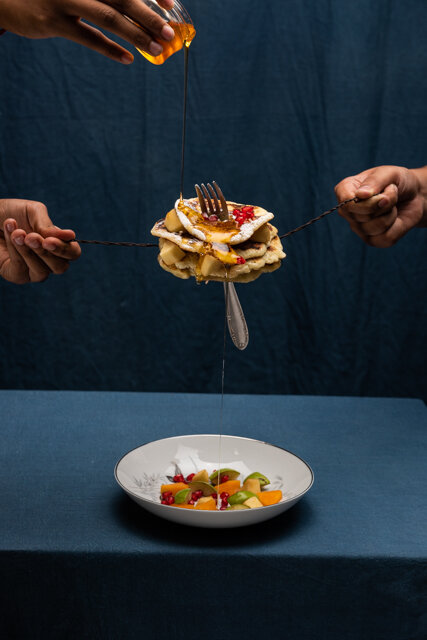
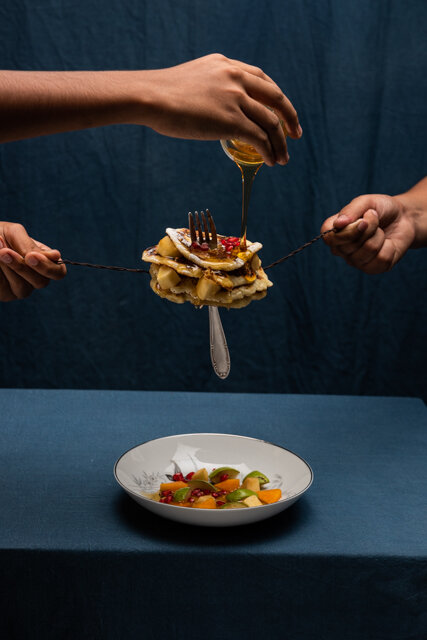
Once the pancakes along with the forks are in place A third person has to start pouring the honey over the pancakes as the photographer starts clicking the photographs one after another till all the honey runs out.
Import the pictures onto Adobe Photoshop, crop out the hands on the sides and edit out the wire around the fork.
You may have to overlay additional images to get the right flow of the honey if you do not get a perfect shot. Most of the food shoot is a hit of miss with these details because you can rarely control how liquid flows.
Some basic adjustments for levels, brightness and contrast may be required to finalize the image.
And that’s about it. You now have yourself floating pancakes 😊
Try this out and let us know what you think about the process of photographing food.